
Garbage Disposal 101: Installation, Maintenance, and Troubleshooting for St. Charles Kitchens

A properly functioning garbage disposal can make kitchen clean-up quick and efficient, but it’s also one of the most misunderstood appliances in a home. Whether you’re a seasoned pro or a brand-new user, understanding the ins and outs of garbage disposal installation, maintenance, and troubleshooting is essential for keeping your St. Charles kitchen running smoothly. In this comprehensive guide, we’ll cover everything from the basics of how disposals work to best practices for extending their lifespan—all while helping you avoid common pitfalls and expensive repairs.
1. What Is a Garbage Disposal and How Does It Work?
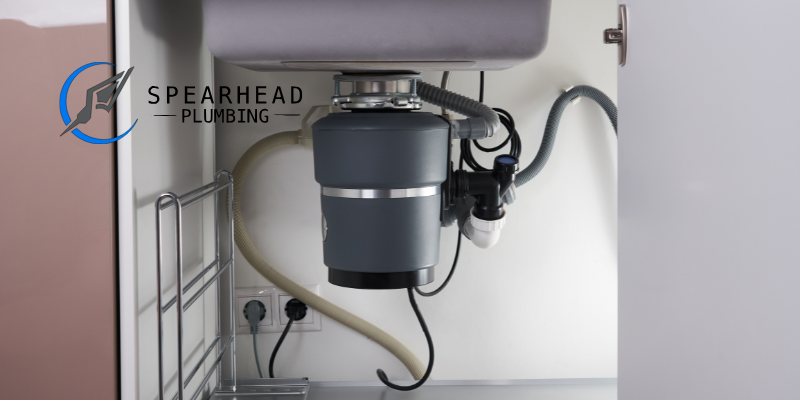
At its core, a garbage disposal is an electrically powered device installed under your kitchen sink that grinds up food waste into small particles, allowing them to pass through your plumbing system. The internal components are typically made up of a few key parts:
- Hopper Chamber: The main chamber where food waste enters from the sink drain.
- Shredder Ring and Impellers: These metallic grinding components spin at high speeds to break down food waste.
- Motor: Powers the grinding mechanism.
- Drain Outlet: Connects to your sink’s drain line, carrying away pulverized waste.
How It Works:
- When you turn on the disposal, the motor spins the impellers and shredder ring.
- Food scraps are forced against the shredder ring, breaking them down into small particles.
- Water running from the faucet flushes the ground particles through the drain and out to the sewer system or septic tank.
Benefits of a Garbage Disposal
- Reduced Kitchen Waste: Fewer trips to the garbage can, and less food waste rotting in your trash.
- Minimized Odors: Grinding waste immediately helps prevent lingering smells in your kitchen.
- Environmental Impact: Redirecting food scraps away from landfills can help reduce methane emissions, although the local wastewater treatment process also plays a role in sustainability.
2. Choosing the Right Garbage Disposal for Your St. Charles Home
Not all disposals are created equal. The right model depends on factors like your household size, budget, and existing plumbing setup. Here are some crucial considerations:
2.1 Motor Power (Horsepower)
- 1/3 HP: Best for very light use, such as single-person households that rarely cook.
- 1/2 HP: A middle-ground option that can handle moderate daily use, but may struggle with fibrous or tough scraps.
- 3/4 HP to 1 HP and Above: Ideal for larger families or households that frequently cook and dispose of heavier scraps (like peels, bones, and fibrous vegetables).
2.2 Continuous-Feed vs. Batch-Feed
- Continuous-Feed: Operates as long as you keep the switch on. Generally more common, easy to use, but slightly riskier around children or if you accidentally drop utensils into the disposal.
- Batch-Feed: Activated by placing a stopper or cover in the drain after loading food waste. Safer, but usually more expensive and slower for large quantities of scraps.
2.3 Noise Levels
Some disposals have additional insulation or special design features to reduce noise. This can be especially helpful in open-concept living spaces where the kitchen is adjacent to living or dining areas.
2.4 Septic-Compatible Models
If your home uses a septic system instead of a municipal sewer, look for a garbage disposal specifically designed to work with septic systems. These may include built-in bio-chambers or enzyme injectors to help break down waste more efficiently.
2.5 Brand and Warranty
Investing in a reputable brand often means better durability, performance, and longer warranties. Always compare warranty lengths and what they cover—some might include in-home service, while others only cover parts.
3. Step-by-Step Installation Guide
While many St. Charles homeowners opt for professional installation, some prefer a DIY approach. If you’re considering tackling it yourself, here’s an overview of the basic steps:
3.1 Gather Your Tools and Supplies
- Essential Tools: Screwdriver set, plumber’s putty, adjustable wrench, pipe wrench, and possibly a hacksaw for trimming pipes.
- New Disposal Unit: Choose a model compatible with your sink and drain setup.
- Safety Gear: Gloves, eye protection, and non-slip shoes.
3.2 Remove the Old Disposal (If Applicable)
- Turn Off Power: Unplug the unit or switch off the circuit breaker.
- Detach Drain Lines: Loosen the clamps connecting the disposal to the drain pipes.
- Unscrew Mounting Assembly: Support the disposal from below while removing mounting screws or the snap ring.
- Dispose of Old Unit: Some municipal waste facilities or local metal recyclers may accept old disposals.
3.3 Prep the Sink Flange
- Clean the Drain: Scrape away old plumber’s putty or sealant.
- Apply Fresh Putty: Roll plumber’s putty around the new sink flange, pressing it firmly into the drain opening.
- Attach the Mounting Ring: Secure the mounting hardware underneath the sink, ensuring a watertight seal.
3.4 Secure the Disposal
- Connect the Disposal to the Mounting Ring: Align the disposal’s mounting tabs with the mount assembly.
- Twist and Lock: Turn the disposal until it locks securely into place.
- Attach Drain Lines: Connect the dishwasher inlet hose (if applicable) and the main drain pipe using hose clamps.
3.5 Wiring (If Needed)
- Hardwired vs. Corded: Some disposals come with a power cord pre-attached, while others require direct wiring.
- Follow Local Codes: Ensure connections are grounded, and always turn off the breaker before handling wiring.
3.6 Test the Disposal
- Leak Check: Run water and inspect the area beneath the sink for any leaks.
- Power Test: Restore power at the breaker or plug in the unit. Turn on the disposal briefly to confirm it runs smoothly.
Pro Tip: If you’re uncomfortable with electrical or plumbing tasks, hiring a licensed professional is highly recommended. Improper installation can lead to leaks, electrical hazards, or voided warranties.
4. Operating Your Garbage Disposal Safely
Once installed, using the disposal correctly can help extend its life and avoid clogs or damage.
4.1 Best Practices
- Run Cold Water: Always use cold water before, during, and after operation to help solidify grease or fats, making them easier for the disposal to grind.
- Gradual Feeding: Don’t dump large amounts of food waste at once. Feed scraps slowly to avoid jams.
- Keep It Clean: Periodically grind a few ice cubes or citrus peels to clean and freshen the disposal.
4.2 What You Can (and Can’t) Put Down the Disposal
Safe to Grind
- Fruit scraps (minus large seeds or pits)
- Vegetable peelings (soft or moderate thickness)
- Small, soft bones (like fish bones, though check your unit’s manual)
- Coffee grounds in small amounts (though some prefer to compost them)
Avoid
- Grease and Oil: Can solidify and cause clogs.
- Fibrous Foods: Celery, artichokes, corn husks—these can wrap around the impellers.
- Large Bones: Beef, pork, or chicken bones can damage the shredder ring.
- Egg Shell Membranes: The thin film can wrap around moving parts.
- Pasta and Rice: Expand in water, potentially causing blockages.
5. Routine Maintenance for a Healthy Disposal
A little regular upkeep can save you from smelly drains, slow performance, or costly repairs.
5.1 Cleaning
- Weekly Flush: Run cold water, squirt in a small amount of dish soap, and let the disposal run for 30 seconds.
- Deep Clean: Throw in a handful of ice cubes and a few citrus peels, then run cold water while operating the disposal. The ice sharpens the impellers, and the citrus peels help neutralize odors.
5.2 Deodorizing
- Natural Methods: Use baking soda and vinegar. Pour 1/2 cup baking soda down the disposal, followed by 1/2 cup vinegar. Let it fizz for a few minutes before rinsing with cold water.
- Commercial Cleaners: If you prefer off-the-shelf solutions, look for disposal cleaners specifically designed to be safe for rubber and metal components.
5.3 Inspecting the Splash Guard
- Remove and Clean: The rubber splash guard can accumulate debris over time. Remove it if your model allows, and scrub away stuck-on bits of food.
- Check for Damage: A torn splash guard can let food particles or water spray back up into your sink cabinet.
5.4 Checking for Loose Parts
- Vibrations: If your disposal vibrates excessively, the mounting ring or internal components might be loose. Tighten them carefully or consult a professional if you’re unsure.
6. Common Garbage Disposal Problems and How to Fix Them
Even the best-maintained disposal can run into issues. Here’s how to handle typical problems:
6.1 Jams
Symptoms: Humming sound without grinding, or disposal stops shortly after starting.
Quick Fix:
- Turn Off Power: Unplug or switch off the breaker.
- Use a Wrench: Many disposals include a hex wrench that fits into a bottom slot. Rotate it to manually free up the jam.
- Reset Button: Press the red or black reset button on the unit’s underside if it popped out.
6.2 Clogs
Symptoms: Water backing up into the sink, slow draining.
Quick Fix:
- Plunge: Use a sink plunger on the drain. Make sure the other side of a double sink is plugged.
- Check the Trap: If plunging fails, remove the P-trap under the sink and clear blockages manually.
- Avoid Chemicals: Drain cleaners can damage disposal components. Stick to mechanical methods or call a plumber.
6.3 Leaks
Symptoms: Water pooling under the sink, damp cabinet surfaces, dripping from connections.
Common Sources:
- Sink Flange: Re-seal with plumber’s putty if loose.
- Dishwasher Hose: Tighten or replace the clamp if it’s dripping.
- Cracked Disposal Body: Unit may need replacement if the housing is damaged.
6.4 Strange Noises
Symptoms: Metal-on-metal grinding, rattling, or loud squeals.
Quick Fix:
- Foreign Objects: Sometimes utensils or small objects fall in. Always turn off the power before reaching in to remove anything.
- Worn Impellers: If the noise persists, you may need new blades or an entire disposal replacement.
6.5 Overheating or Frequent Resets
Symptoms: Disposal stops working mid-grind or constantly requires pressing the reset button.
Possible Causes:
- Overloading: Grinding too much waste at once.
- Motor Issues: An aging unit with a failing motor may overheat more quickly.
7. When to Call a Professional
While simple jams and minor clogs can often be resolved with DIY measures, some situations call for expert help:
- Electrical Concerns: If you’re uncomfortable handling wiring or suspect a short circuit.
- Persistent Clogs: Frequent clogs may indicate a deeper plumbing issue beyond the disposal itself.
- Leaks You Can’t Identify: Hidden pipe damage or a failing seal may require specialized tools and knowledge.
- Replacement: Upgrading to a larger horsepower unit, or switching from continuous-feed to batch-feed, is best handled by a plumber who can ensure proper fit and venting.
8. Extending the Lifespan of Your Garbage Disposal
Most disposals last between 8 and 15 years, depending on usage and care. To maximize yours:
- Avoid Hard-to-Grind Items: Bones, pits, and fibrous foods can wear out the impellers faster.
- Run It Regularly: Using your disposal often prevents rust or corrosion.
- Add a Surge Protector: If your home experiences power fluctuations, protecting the circuit can reduce electrical strain on the motor.
- Schedule Routine Inspections: Ask your plumber to inspect the disposal and surrounding plumbing during annual or biannual home maintenance visits.
9. Environmental Considerations
While garbage disposals can reduce kitchen waste, it’s worth noting that not all municipalities handle food waste similarly:
- Wastewater Treatment: St. Charles’s treatment facilities process organic material to varying extents.
- Composting: For maximum eco-friendliness, consider composting fruit and vegetable scraps, and use the disposal for small remnants or occasional scraps.
- Water Usage: Running water each time you use the disposal increases water consumption, so be mindful of how often and how long you operate it.
10. Conclusion
A well-chosen, properly installed, and regularly maintained garbage disposal can be a real asset in any St. Charles kitchen. By following best practices—like feeding scraps gradually, avoiding certain materials, and cleaning the disposal regularly—you can keep your unit running efficiently and extend its lifespan. When issues do arise, a bit of troubleshooting know-how can save you time and frustration. However, never hesitate to contact a professional if the problem is persistent or involves complex plumbing or electrical work.
Ready to upgrade, fix a stubborn leak, or simply ensure your garbage disposal is running at peak performance? Reach out to Spearhead Plumbing and let our skilled team help you maintain a clean, efficient kitchen.